 This file is created for the 2017-2018 Colorado Early Colleges Middle School Computer Science Class. The first year it is a work in progress. For my 2017-2018 class, please share you thoughts and desires of what you would like to learn. We will make this class the best class possible.
In order to create nice webpages, there are three basics that you need to learn. They are:
- Hypertext Markup Language (HTML) – Basic description language for web-sites.
- Cascading Style Sheets (CSS) – used to modify look-and-feel of HTML.
- JavaScript (JS) – scripted language that gives dynamic functioning to web-sites.
We will be covering HTML and CSS in this section. JavaScript will have its own section. The Content of this section follows:
Table of Contents
- Visual Studio 2017 Community
- Sources for Course
- Basic HTML
- Section 1 – Adding Headings <h?> and Paragraphs <p>
- Section 2 – Links to Pictures and Websites
- Section 3 – Attributes
- Section 4 – Cascading Style Sheets
- Section 5 – Tables
- Section 6 – Block Quotes and Quotes
- Section 7 – Division (<div>) Settings
- Section 8 – Picture with Caption
- Section 9 – Lists and Table of Contents
- Section 10 – Setting Up a Web Page
- Section 11 – Making all Web Pages Look the Same
- Section 12 – Third Page
Visual Studio 2017 Community
We will be using Visual Studio 2017 Community for our development environment. To save everything we need in one location, it is best to open and use a Project. The way to do this is to:
- Open Visual Studio 2017 Community
- You can either bring up a new project or adopt an html file to include in your project.
- Select File:New:Project… from the Ribbon, which will bring up a dialog box.
- From the dialog box, open the Installed and then C# then Web menus.
- Select Web Site and choose the ASP.NET Empty Web Site option.
- Change the name to MyWebProject and put in a directory on your flash drive.
- It will ask you if you what to create a descriptor file called MyWebProject.sln. Say yes.
- Select File:New:File… and in the dialog box under Visual C#, select HTML Page. Set file name to MyFirstPage.html.
- If you already have a web page, select File:New:Project from Existing Code…
- When dialog box comes up, select Visual C# and then press [Next>].
- Select the directory in which your old HTML file resides and choose a name.
- Press [Finish] and create your project.
- Open your existing HTML file by selecting File:OpenFile… and choosing the file to open.
- Select File:New:Project… from the Ribbon, which will bring up a dialog box.
- You now have your project and are ready to start.
Sources for Course
I will use https://www.w3schools.com/ as the basis for teaching HTML. The site has descriptions of HTML, CSS, and JavaScript. I will add other sources used here.
Basic HTML
You now have your initial website up. We will go through some basic steps to set up a basic web page. It order to make it look more beautiful, an understanding of the Cascading Style Sheet (CSS) is required.
The default HTML file on Visual Studio looks like:
<!DOCTYPE html>
<html>
<head>
    <meta charset="utf-8" />
    <title></title>
</head>
<body>

</body>
</html>
In an HTML file, all tags are set off by a less than/greater than pair. The item ends with another bracketed identical term that starts with a less than and slash ($lt;/). The sample would be <tag>content</tag>. Most tags require a matching terminating tag. All tags are case-insensitive. By default, tags are all lower-case.
The first line of this sample specifies the type of document (DOCTYPE) that follows. This is required for most files that reside on websites, except for the Cascading Style Sheet (CSS) file. The file also requires a suffix of .html or .htm.
The second line is <html> with a closing </html> at the end of the file. An html file is divided into two parts. The first part is the <head>…</head> which contains the title of the page and any CSS references required. The CSS information can be contained in the <head> but is usually contained in a separate file that is linked in to the <head>. The <head> is followed by the <body>…</body> which contains all of the information that is visible to the user. Be careful about properly matching tags. Mismatched tags will cause a weird appearance in your web page. All <tag>s that you open, must be closed with similar tag with a leading “/”. For example <tag> must be closed with </tag>. Tags must be closed in the reverse order that they were created. For example: <li><b><I> must be closed with </I></b></li>. Any other order may have strange side-effects.
Section 1 – Adding Headings <h?> and Paragraphs <p>
Today, we will create a simple web page with a title (that appears in a tab on the desired browser, along with three headers and three accompanying paragraphs. Be careful to distinguish between headings which appear as subtitles in the main webpage and the <head> section which has information that controls the appearance of your web site. In the title for this section, I have <h?>. The ? is to have the level of the heading, from <h1> through <h6>. The larger the number, the less important the heading.
<!DOCTYPE html>
<html>
<head>
   <meta charset="utf-8" />
   <title>My First Web Page</title>
</head>
<body>
   <h1>First Level Heading</h1>
   <p>The first level heading indicates the main sections of your page. Sometimes they are included in
   a Table of Contents. They will be the biggest listing on your page.</p>
   <h2>Second Level Heading</h2>
   <p>The second level heading breaks down a topic from the First    Level to main subtopics.</p>
   <h3>Third Level Heading</h3>
   <p>For the third level, this (and even smaller headings) can be   used to organize a topic, to
   ensure logical divisions of topic are properly identified.</p>
</body>
</html>
How to “Build” and “Debug” Your Website
There are some nice added benefits to developing a website or webpage using Visual Studio. These include:
- Matching tags. Once you type in one tag, in types the closing tag for you. All you need to do is type what you want between the start <tag> and end </tag>.
- You may have the tool look over your code for some basic errors by selecting Build:Build Solution.
- To display your webpage, select Debug:Start Debugging. Check over your webpage and then go back and make any modifications you would like to see done.
Section 2 – Links to Pictures and Websites
Today we will add comments and links to pictures and other websites to the webpage. This again is done through specialized tags. Comments are delimitated by a “<!–” and “–>” pair. For example:
<!-- This comment goes anywhere in an .html or .css file.
     It can be contained on multiple lines and
     will not appear on your webpage. -->
Section 3 – Attributes
Adding attributes to tags is easy and it can be fun. It has to be done to each individual tag. The purpose of this exercise is to add attributes to an actual tag, like a heading (<h1>). Attributes can be added directly to a tag, in a <style>…</style> section in the <head> section of your website, or in a separate Cascading Style Sheet (CSS) file. The example here is strictly the attributes attached to a tag. An example of an attribute to <h1> is:
<h1 style=”font-size:300%; color:darkgreen; text-align:center;”>My First Heading</h1>
If an attribute is set in the main .html file, then any <style> or stylesheet defined attributes, that have the same attribute name, are not applied to the web page element. In the above case, font-size, text color, text-alignment are all defined in this line, therefore no changes will be made.
Section 4 – Cascading Style Sheets
A Cascading Style Sheet (CSS) makes adding attributes to every use of a particular tag much easier. In general, it works great on all occurrences of a particular tag. However, if a tag has attributes already locally defined, then the local version of any attribute takes precedence over any CSS tag. If your Style Sheet (CSS) does not seem to be changing the attributes of the tags you are modifying, there are a few basic steps to take to make sure that or HTML/CSS connection is set up correctly:
- For this class, make sure that your .html and .css files are in the same directory.
- Verify that the name of the .css file in the named link from the .html file are the same.
- The link should be as follows. With your .css file name replacing
myStyleSheet.css
:
<link rel=”stylesheet” type=”text/css” href=”myStyleSheet.css”> - To verify that your files are actually connect, type the following code in your .css file and verify that the headers and background of the body are changed.
<!--This is the CSS (Cascading Style Sheet) file to help modify the html files that include it. -->
body {
    background-color: ivory;
    overflow: auto;
}

h1 {
    color: darkgoldenrod;
    text-align: center;
    overflow: auto;
}

h2 {
    color: darkred;
    text-align: center;
    overflow: auto;
}

h3 {
    color: darkblue;
    text-align: center;
    overflow: auto;
}
The first test is to only modify
Section 5 – Tables
Creating tables and corresponding CSS files.
Section 6 – Block Quotes and Quotes
Block Quotes – Block Quotes are used to quote some website. In this example, I am using the IEEE webpage. Like most other tags, its appearance can be modified by CSS. The .html code would look like:
<h2> Block Quotes</h2>
<blockquote cite="https://www.ieee.org/index.html">
Advancing Technology for Humanity - The world's largest technical professional organization for the advancement of technology!
</blockquote>
<!– while the CSS portion would be: –>
blockquote {
    color:darkblue;
    background-color:lightblue;
    font-weight:bold;
}
The assignment is to enter this code and then to find another site that you like and enter a “blockquote” that relates to that site. Use the same information. Use the class modification to give this a different color text and color background.
Section 7 – Division (<div>) Settings
This section is how to add a distinctive block around a predefined (<pre>) section of code through the (<div>) tag. The div needs to be given a structure in the CSS file:
div {
    background-color: lightgreen;
    width: 600px;
    border: 25px solid green;
    padding: 25px;
    margin-left: auto;
    margin-right: auto;
}
The colors need to be set to look nice together. The width should be wide enough to comfortable fit the lines without forcing <pre> to add a horizontal scroll bar. The entry I chose was from Edgar Allan Poe.
<h1>This is my poetry Page</h1>
<p>
I like various types of poetry. One of my favorite poems when I was in Middle School was by <b>Edgar Allan Poe</b> and was  titled <q>The Raven</q>. It is also sometimes referenced as <q>Quote the Raven Nevermore</q>.
</p>

<div><pre>
Once upon a midnight dreary, while I pondered, weak and weary,
Over many a quaint and curious volume of forgotten lore,
While I nodded, nearly napping, suddenly there came a tapping,
As of some one gently rapping, rapping at my chamber door.
"'Tis some visitor," I muttered, "tapping at my chamber door-
Only this, and nothing more."

Ah, distinctly I remember it was in the bleak December,
And each separate dying ember wrought its ghost upon the floor.
Eagerly I wished the morrow;- vainly I had sought to borrow
From my books surcease of sorrow- sorrow for the lost Lenore-
For the rare and radiant maiden whom the angels name Lenore-
Nameless here for evermore.
</pre></div>
Section 8 – Picture with Caption
It is always good to be able to add a caption to a picture. There is a figure command, but unfortunately it does not work at this time. I use a table instead. The Code would be as follows to create the table. The flex:right allows you to have a picture on the right with the text on the left. I have left the figure command in the code as a comment. Also, if the picture does not show up in one browser, copy the file address from the non-working browser into a second browser. The pictures probably will show up in the second browser.
 <h2>This is the Picture Caption Example</h2>
    Now for an interesting picture to display. Allow text around it. If you use the flex style option, you can
    have the picture stay on either the left or right and the text fill up the rest of the space. It is
    really nice. However, if it does not work, the formatting looks very odd. Let us see where this one comes out.

    <table class="image" style="float:right; margin-right:50px;">
        <caption align="bottom">
            <div class="orange">The picture above is 330px wide. The total width of this element is also 330px. It is taken of the stars of
            a PBS childrens program on GUAM.</div>
        </caption>
        <tr> <td><img class="orange" src="KGTF TV.jpg" alt="KGTF TV"> </td> </tr>
    </table>

    <!-- The following should technically work, but it does not.
    <figure>
       <img class="orange" src="KGTF TV.jpg" alt="KGTF TV">
       <figcaption>
          The picture above is 330px wide. The total width of this
          element is also 330px. It is taken of the stars of
          a PBS childrens program on GUAM.
       </figcaption>
    </figure>
   -->
The corresponding entries in the Style Sheet (CSS file are:
img.orange {
   width: 330px;
}

div.orange {
   padding: 8px;
   width: 330px;
   border: 3px solid orange;
   margin: 2px;
   background-color: lightyellow;
}

<!--
figcaption.orange {
   padding: 8px;
   border: 10px solid orange;
   margin: 2px;
   background-color:lightyellow;
} -->
Section 9 – Lists and Table of Contents
Lists are an important part of pages. They can be used for various purposes, including making a Table of Contents
. There are two needed tags, one on the destination line and one on the reference line. The two lines may or may not be in the same file. In general, references can be to an entire file or to a section within the file. If the later is the case, then <q>#</q> must precede the in-file tag name. The following shows both a list which creates the Table of Contents as well as the reference tags of the table entries and the tag for the first Header to which the ToC references.
<h1>Table of Contents</h1> <ul> <li><a href="#DIV">This is the use of <div></a></li> <li><a href="#Picture">This is the Picture Caption Example</a></li> </ul> <h1><a name="DIV" id="DIV"></a>This is the use of <div></h1>
The list is an unordered list (<ul>) as compared to an ordered list (<ol>).
Section 10 – Setting Up a Web Page
You have now most of the elements needed to make a better looking web page. Do the following and you have a background with menus a header, and a text area. The main parts you need to define are:
- <div class=”container”> – holds everything on the page within the <body> section. Should cover 100% of the body of your page and contain your background picture.
- <header> – Where the title of the page goes and any other picture you would like. Should leave 10% on each side for margins.
- <nav> – Where you menus go. Should be same width as header.
- <article> – Where your main content goes, must have solid background to go over the <div> background. Needs to be the same width as the <header>.
- <aside> – Not shown in this example, can be used as a sidebar. Will take up space from the <article> section.
- <footer> – goes across the bottom of the page, usually used for <copy> copyright information. It has the same margins as the <header>.
The CSS entry is:
div.container {
    width: 100%;
    background-image: url(sunset-large.jpg);
    border: 1px solid gray;
}

header {
    padding: 1em;
    background-attachment: fixed;
    margin-left: 10%;
    margin-right: 10%;
    height: 110px;
    background-image: url(sunset-bar.jpg);
    font-size: x-large;
    font-family: Algerian;
    color: darkred;
    clear: both;
    text-align: center;
}

nav {
    margin-left: 10%;
    margin-right: 10%;
    padding: 1em;
    background-color: lightgreen;
    color: darkblue;
    font-size:large;
}

article {
    margin-left: 10%;
    margin-right: 10%;
    border-left: 1px solid gray;
    background-color: ivory;
    padding: 1em;
    overflow: hidden;
}

footer {
    padding: 1em;
    margin-left: 10%;
    margin-right: 10%;
    color: lightyellow;
    background-color: darkorange;
    clear: left;
    text-align: center;
}
Download the two files sunset-bar.jpg and sunset-large.jpg from IC to use in the .css and .html files. Add the following code to the top of the <body> section of your second web page. Please be careful, remember that all web pages have only one <body> …. </body> pair:
<body>
    <div class="container">
        <header>
            My Second Web page
        </header>
        <nav>
      <a href="MyFirst.html" style="text-decoration: none; padding-right: 20px;">My First Web Page</a>
          <a href="SecondPage.html" style="text-decoration: none; padding-right: 20px;">My Second Web Page</a>
          <a href="https://cookhealthalliance.com/education/cec-fc/spring-2018/p5-cs-middle-school/"
           style="text-decoration: none; padding-right: 20px;">Syllabus</a>
      <a href="https://cookhealthalliance.com/education/cec-fc/spring-2018/p5-cs-middle-school/html/"
         style="text-decoration: none; padding-right: 20px;">HTML Instructions</a>
         </nav>
        <article>
and at the end of the file:
 </article>
    <footer>
       The end of the example & Copyright © CookHealthAlliance.com
    </footer>
  </div>
</body>
As a help, I use the following file for the header bar:

Sunset bar for header
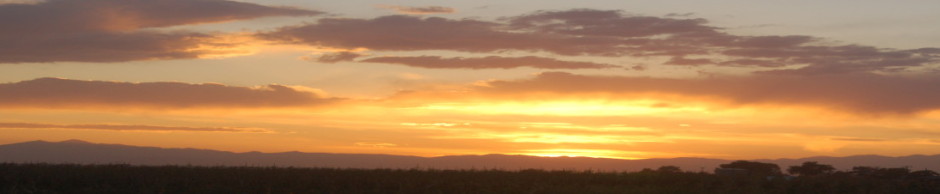
and the following file for the overall background:

Large sunset picture for background
A shrunken version of the web page appears as:

Screen Shot of web page
Section 11 – Making all Web Pages Look the Same
You made an original page. Mine was MyFirst.html. You can add the lines that you added to your second web page under the <body> tag below the <body> tag in your first web page.
As a side note, you can also create your own tag, like I did for <dblue> in my .css file.
dblue {
     color: darkblue;
     font-weight: bold;
}
Using it is simple in your .html file:
I like various types of poetry. One of my favorite poems when I was in Middle School was by
<dblue>Edgar Allan Poe</dblue> and was  titled <q>The Raven</q>. It is also
sometimes referenced as <q>Quote the Raven Nevermore</q>.
Update the header of your first .html file to match the second, they should both have the following:
<body>
    <div class="container">
        <header>
            My Third Web page
        </header>
        <nav>
            <dblue>
                <a href="MyFirst.html" style="text-decoration: none; padding-right: 20px;">My First Web Page</a>
                <a href="SecondPage.html" style="text-decoration: none; padding-right: 20px;">My Second Web Page</a>                <a href="https://cookhealthalliance.com/education/cec-fc/spring-2018/p5-cs-middle-school/"
                   style="text-decoration: none; padding-right: 20px;">Syllabus</a>
                <a href="https://cookhealthalliance.com/education/cec-fc/spring-2018/p5-cs-middle-school/html/"
                   style="text-decoration: none; padding-right: 20px;">HTML Instructions</a>
            </dblue>
        </nav>
        <article>
and the end:
</article> <footer>The end of the example and Copyright © CookHealthAlliance.com</footer> </div> </body>
Section 12 – Third Page
I am creating a third page to hold the JavaScript code and features that access the code to be able to do something interesting. At the bottom of the
Second Page, I added the following code:
HTML Code goes here
The Third page starts off as:
<!DOCTYPE html>
<html>
<head>
  <meta charset="utf-8" />
  <title>Third</title>
  <link rel="stylesheet" type="text/css" href="myStyleSheet.css">
</head>
<body>
  <div class="container">
    <header>
My Third Web page
    </header>
    <nav>
      <dblue>
        <a href="MyFirst.html" style="text-decoration: none; padding-right: 20px;">My First Web Page</a>
        <a href="SecondPage.html" style="text-decoration: none; padding-right: 20px;">My Second Web Page</a>
        <a href="ThirdPage.html" style="text-decoration: none; padding-right: 20px;">My Third Web Page</a>
        <a href="https://cookhealthalliance.com/education/cec-fc/spring-2018/p5-cs-middle-school/"
style="text-decoration: none; padding-right: 20px;">Syllabus</a>
        <a href="https://cookhealthalliance.com/education/cec-fc/spring-2018/p5-cs-middle-school/html/"
style="text-decoration: none; padding-right: 20px;">HTML Instructions</a>
      </dblue>
    </nav>
    <article>
      <h2><a name="Buttons-JS" id="Buttons-JS"></a></a>Using Buttons and JavaScript</h2>

    </article>
  </div>
</body>
</html>
Other Sources
Find out more about HTML. the main source I used is <a href=”W3Schools.